
Introduction
Embarking on a journey to run Apache Spark on a local Kubernetes cluster? This comprehensive guide is crafted for data engineers who seek to leverage the power of Spark within a Kubernetes environment. Whether you’re a beginner or an adept engineer, these steps will ensure a smooth and efficient setup.
To complement this article, all the code and configuration files used in this guide are available in the GitHub repository: playground-spark-local-kubernetes.

Step 1: Installing kubectl
Why It’s Crucial: kubectl is your gateway to interacting with your Kubernetes cluster. Let’s get it up and running!
- How to Install: Follow these easy steps at Kubernetes Installation Guide.
For example, if you are on Ubuntu or another Linux distribution that supports the snap package manager, kubectl is available as a snap application:
snap install kubectl --classic
kubectl version --client
Step 2: Embrace Kind for Local Clusters
Discover Kind: A powerful tool to spin up Kubernetes clusters locally using Docker containers.
Installation Guide: Jumpstart with Kind by following instructions at Kind Quick Start.
Step 3: Crafting a Multi-node Cluster
Creating a Kind Configuration File
- Craft a YAML File: Start with a new
.yamlfile to outline your cluster’s architecture. - Define Multi-Node Structure: Include a control node and multiple worker nodes. Here’s a sample snippet:
kind: Cluster apiVersion: kind.x-k8s.io/v1alpha4 nodes: - role: control-plane extraPortMappings: - containerPort: 4040 # Spark UI hostPort: 4040 - containerPort: 18080 # Spark History Server hostPort: 18080 - containerPort: 10000 # Spark Thrift Server hostPort: 10000 - containerPort: 8081 # Spark Worker hostPort: 8081 - role: worker - role: worker - Save Your Configuration: Name it descriptively, like
config-cluster.yaml.
Launching Your Customized Cluster
- Create your cluster based on your configuration file:
kind create cluster --config config-cluster.yaml --name sparkclusterExpect a smooth setup and a final message indicating a successful creation:
Creating cluster "sparkcluster" ...
 ✓ Ensuring node image (kindest/node:v1.27.3) 🖼
 ✓ Preparing nodes 📦 📦 📦
 ✓ Writing configuration 📜
 ✓ Starting control-plane 🕹️
 ✓ Installing CNI 🔌
 ✓ Installing StorageClass 💾
 ✓ Joining worker nodes 🚜
Set kubectl context to "kind-sparkcluster"
You can now use your cluster with:

kubectl cluster-info --context kind-sparkcluster

Have a nice day! 👋
You should see information about the cluster, indicating that it is working correctly
kubectl cluster-info:kubectl cluster-info --context kind-sparkclusterFinally, run the command
kubectl get nodesand verify that all nodes are active by executing.
Step 4: Preparing for Apache Spark
Downloading Apache Spark
- Choose Your Spark Version: Visit Apache Spark Downloads and select a pre-built package for Hadoop).
- Extract and Move Spark to a desired location:
tar xvf spark-<spark-version>-bin-hadoop2.7.tgz sudo mv spark-<spark-version>-bin-hadoop2.7 /usr/local/spark - Environment Setup: Add Spark to your
PATHfor universal access.
Dockerizing Spark for Kubernetes
Preparing the Docker Image
- Optional Step: Modify the Dockerfile: Before building the image, it’s wise to tweak the Dockerfile located at
/usr/local/spark/kubernetes/dockerfiles/spark. This step is crucial to circumvent potential authentication issues with Kerberos. For detailed instructions and code, refer to this repository. - Build the Docker Image using
docker-image-tool.sh:cd /usr/local/spark ./bin/docker-image-tool.sh -t my-tag build
Step 5: Injecting Spark into Kind
- Load Your Spark Image into the Kind cluster:
kind load docker-image spark:3.5.0 --name sparkcluster
Step 6: Deploying Spark Master Node
- Create a YAML File for Spark Master: Name it
spark-master-deployment.yamland include your Spark image details.kind: Deployment apiVersion: apps/v1 metadata: name: spark-master spec: replicas: 1 selector: matchLabels: component: spark-master template: metadata: labels: component: spark-master spec: containers: - name: spark-master image: spark:3.5.0 command: [ "/opt/spark/sbin/start-master.sh" ] ports: - containerPort: 7077 - containerPort: 8080 resources: requests: cpu: 1000m - Launch and Verify the Pod:
kubectl apply -f spark-master-deployment.yaml
kubectl get pods
Enabling Web Interface Access for Spark Master
- Identify and Forward the Pod:.
kubectl port-forward pod/spark-master-xxxxx 8080:8080 - Access the Web Interface at
http://localhost:8080.
Step 7: Configuring Spark Workers
- Deploy Worker Nodes and ensure communication with the Spark Master.
kind: Deployment
apiVersion: apps/v1
metadata:
  name: spark-worker
spec:
  replicas: 2
  selector:
    matchLabels:
      component: spark-worker
  template:
    metadata:
      labels:
        component: spark-worker
    spec:
      containers:
        - name: spark-worker
          image: spark:3.5.0
          command: [ "/opt/spark/bin/spark-class", "org.apache.spark.deploy.worker.Worker" ]
          args: [ "spark://spark-master:7077" ]
          ports:
            - containerPort: 8081
          resources:
            requests:
              cpu: 1000m
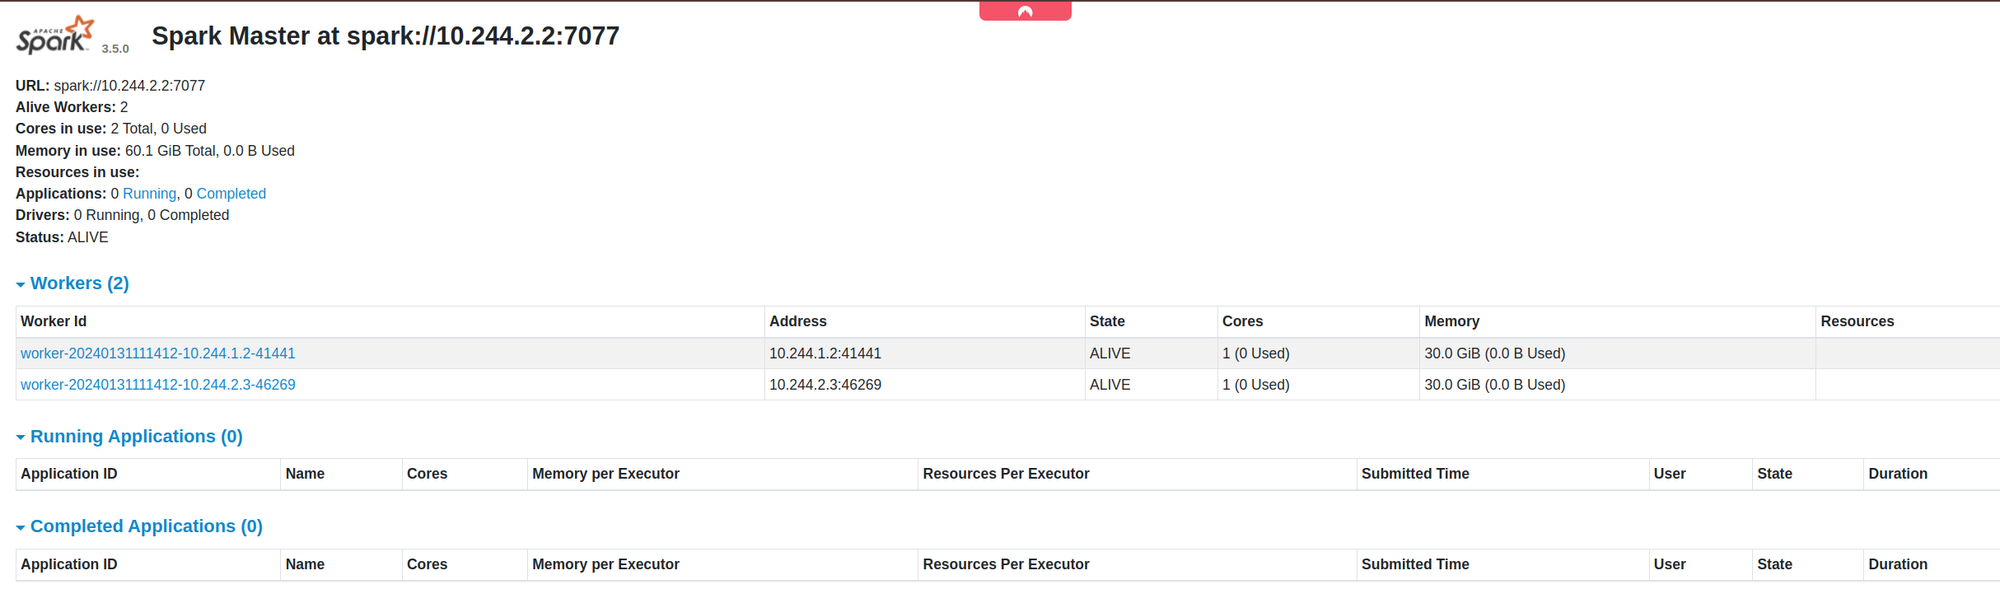
Kubernetes Service for Spark Master
- Define and apply a Kubernetes Service: Match the service name with the worker’s configuration. It is necessary so that the Spark Master can communicate with the Worker nodes to communicate with it.
kind: Service apiVersion: v1 metadata: name: spark-master spec: ports: - name: webui port: 8080 targetPort: 8080 - name: spark port: 7077 targetPort: 7077 selector: component: spark-master - Access the Web Interface: Now navigate again to
http://localhost:8080in your browser and check if the two workers are displayed there:
Step 8: Testing the cluster
Executing a Spark Application Within the Cluster
- Enter the Spark Shell and run a Spark job:.
kubectl exec -n default spark-master-xxx \\
-it -- /opt/spark/bin/spark-shell \\
--conf spark.driver.bindAddress=x.x.x.x \\
--conf spark.driver.host=x.x.x.x
val data = spark.range(1000000).toDF("number").agg(sum("number")).show()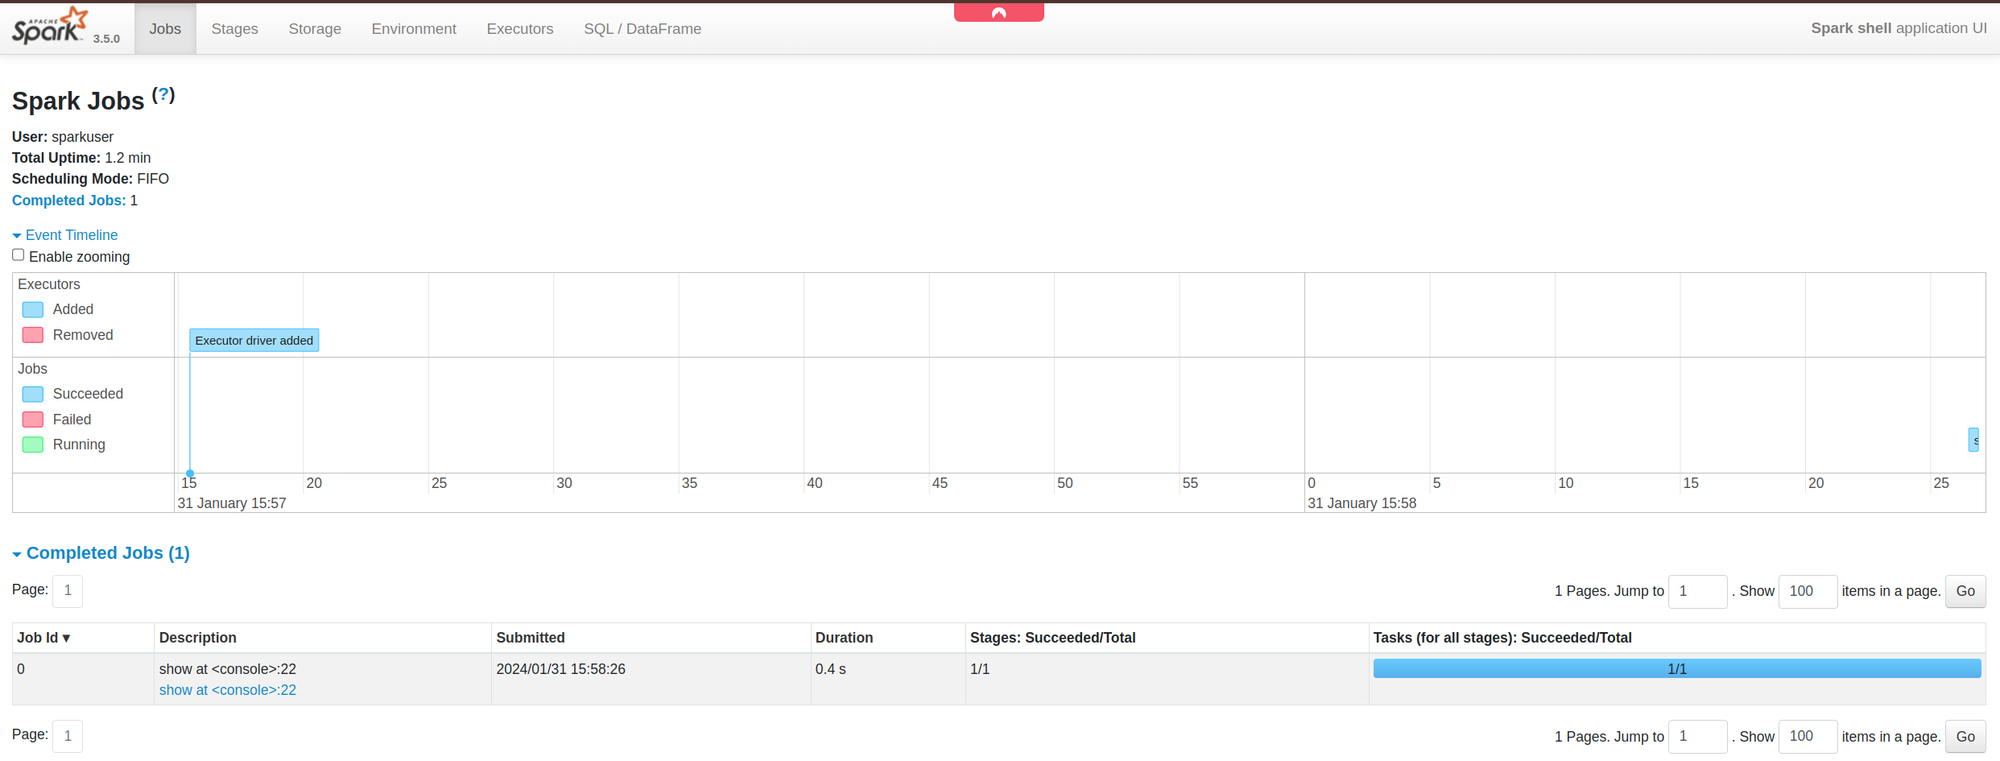
Access the UI at **
localhost:4040**to monitor the Spark job.
Launching a Spark Job with Kubernetes
- Configure RoleBinding and Roles for Spark applications:
apiVersion: rbac.authorization.k8s.io/v1
kind: RoleBinding
metadata:
  name: read-pods
  namespace: default
subjects:
- kind: ServiceAccount
  name: default
  namespace: default
roleRef:
  kind: Role
  name: pod-reader
  apiGroup: rbac.authorization.k8s.io
apiVersion: rbac.authorization.k8s.io/v1 kind: Role metadata: namespace: default name: pod-reader rules: - apiGroups: [""] resources: ["pods", "configmaps", "services", "persistentvolumeclaims"] verbs: ["get", "watch", "list", "create", "delete", "deletecollection"] - Execute a Spark Job:
/opt/spark/bin/spark-submit \\\\
    --master spark://10.244.2.2:7077 \\\\
    --deploy-mode cluster \\\\
    --name spark-examples \\\\
    --class org.apache.spark.examples.SparkPi \\\\
    --conf spark.executor.instances=2 \\\\
    /opt/spark/examples/jars/spark-examples_2.12-3.5.0.jar 10
Configuring a Kubernetes Job for Spark
- Create a YAML File for the Spark Job and apply it:
apiVersion: batch/v1 kind: Job metadata: name: spark-pi spec: template: spec: containers: - name: spark-pi image: spark:3.5.0 command: ["/opt/spark/bin/spark-submit"] args: - --master - k8s://172.19.0.2:6443 - --deploy-mode - cluster - --name - spark-pi - --class - org.apache.spark.examples.SparkPi - --conf - spark.executor.instances=1 - --conf - spark.kubernetes.namespace=default - --conf - spark.kubernetes.container.image=spark:3.5.0 - local:///opt/spark/examples/jars/spark-examples_2.12-3.0.0.jar - "1000" restartPolicy: Never - Deploy the Job:
kubectl apply -f spark-pi-job.yamlThis guide has led you through setting up Apache Spark in a Kubernetes environment using Kind, preparing you to fully utilize Spark’s capabilities in a containerized setup.
https://github.com/cherrera20/playground-spark-local-kubernetes
Leave a Reply